An accessible garden is designed around the people who will actually use it, reducing unnecessary barriers to moving, reaching, resting, watering, planting and harvesting. There is no single accessible layout: the right design depends on the gardener’s mobility, reach, balance, strength, stamina, vision and preferred activities.
That may mean wider and more stable paths, turning space for a wheelchair, raised or elevated beds at a comfortable working height, seating near growing areas, adapted tools, reachable irrigation controls, stronger visual contrast or simply a layout that requires less bending and carrying.
This guide explains how to design an accessible garden, including routes and turning space, slopes and level changes, raised beds, realistic reach ranges, seating, adaptive tools, irrigation access, wayfinding, path surfaces, usable gates and lower-maintenance choices, along with when public or regulated projects need to follow formal accessibility standards.
What Is an Accessible Garden?
An accessible garden allows people with different abilities to enter, move through, rest, garden, and enjoy the outdoor space with fewer unnecessary barriers. It may be a private backyard, a balcony, a community plot, a care facility garden, or a public landscape.
Accessibility can mean reaching into a raised bed from a seated position, recognizing the edge of a path, turning a wheelchair, opening a gate latch, managing a hose, sitting safely between tasks, or finding the way back to the house. These details matter as much as any plant selection.
Accessible design overlaps with universal design, which aims to make environments usable by the broadest range of people without specialized adaptation. Features like smooth, firm paths, clear routes, and comfortable seating tend to benefit children, older adults, caregivers, and visitors carrying tools — not only people with specific disabilities.
Begin With User-Centered Planning
Before drawing a layout, talk with the person or group who will use the garden. Ask what they want to grow and do, and what currently makes gardening difficult or impossible for them.
Consider whether the user walks independently, relies on a cane, walker, or wheelchair, gardens seated, has limited grip or reach, experiences fatigue, has low vision, or needs a predictable and consistent route. Don’t design around a diagnosis alone — two people with the same condition may have very different abilities, preferences, and daily variation in energy.
List the specific activities the garden should support:
- Entering and moving through the garden, including to and from parking or the house
- Planting, weeding, and harvesting
- Watering and adjusting irrigation
- Carrying tools, soil, or harvested plants
- Sitting, resting, and socializing
- Observing plants, wildlife, and seasonal change
If possible, walk or roll the planned route using the user’s actual mobility aid before construction begins. Note where wheels catch, where turning feels tight, where the path edge disappears from view, and where a hose or gate handle becomes awkward to manage. That hands-on test will catch more problems than any diagram.
Create Stable Routes and Turning Space
A garden path needs to be firm, stable, reasonably smooth, and clear of obstacles at all times. It also needs to be wide enough for the person and equipment that will actually use it — including space to pass, turn, or pause where necessary.
Under ADA guidelines, the minimum clear width for an accessible route is 36 inches. In practice, 48 inches works better for most wheelchairs, because it leaves room to maneuver without feeling squeezed, and allows a caregiver or companion to walk alongside. A path narrower than 60 inches should include passing spaces at reasonable intervals so two people can get by each other safely.
Don’t plan only the path between the gate and the first bed. Map the full route: to water, seating, tool storage, compost, shade, and every area where harvesting will happen. A narrow access point can make an otherwise accessible bed completely unusable.
Turning space is one of the most overlooked elements in garden accessibility. A standard wheelchair requires a 60-inch-diameter clear space to complete a full turn. Plan those areas at dead ends, corners, bed entrances, and gate approaches. If the garden path loops back, a T-intersection or a widened bulb-out at the end serves the same purpose.
Keep paths free of hoses, tools, overhanging branches at head height, low plant spillover, and loose decorative objects. Avoid abrupt transitions between surfaces, and make path edges clearly visible without creating a raised lip that can catch a wheel or toe.
Plan Slopes, Steps, and Level Changes
Level ground is generally easier to navigate, but most residential properties include some slope. A gentle, continuous sloped route can work well — provided the grade, surface, drainage, and resting areas are designed for the specific user.
Under the ADA Standards, an accessible walking surface may have a running slope no steeper than 1:20 (5%). A route steeper than 1:20 is treated as a ramp and must meet the applicable ramp requirements. Ramp runs generally may not be steeper than 1:12 and must provide at least 36 inches of clear width, with level landings where required. Handrails are required on ramp runs with a rise greater than 6 inches, while edge-protection requirements include specific exceptions. The maximum cross slope for accessible walking surfaces and ramp runs is 1:48. Even a slight cross slope can make manual wheelchair navigation noticeably harder, particularly on wet or uneven surfaces.
For a private residential garden that is not subject to ADA requirements, use these dimensions as useful accessibility references while designing around the actual gardener’s abilities and mobility equipment. For public, commercial, healthcare, or other regulated projects, verify the complete current standards and applicable local codes rather than relying on individual measurements in isolation.
If steps remain necessary in part of the garden, provide an accessible alternative route where required or practical. Mark changes in level clearly, use appropriate handrails where needed, and provide lighting that illuminates the route without creating glare.
Choose Raised and Elevated Beds

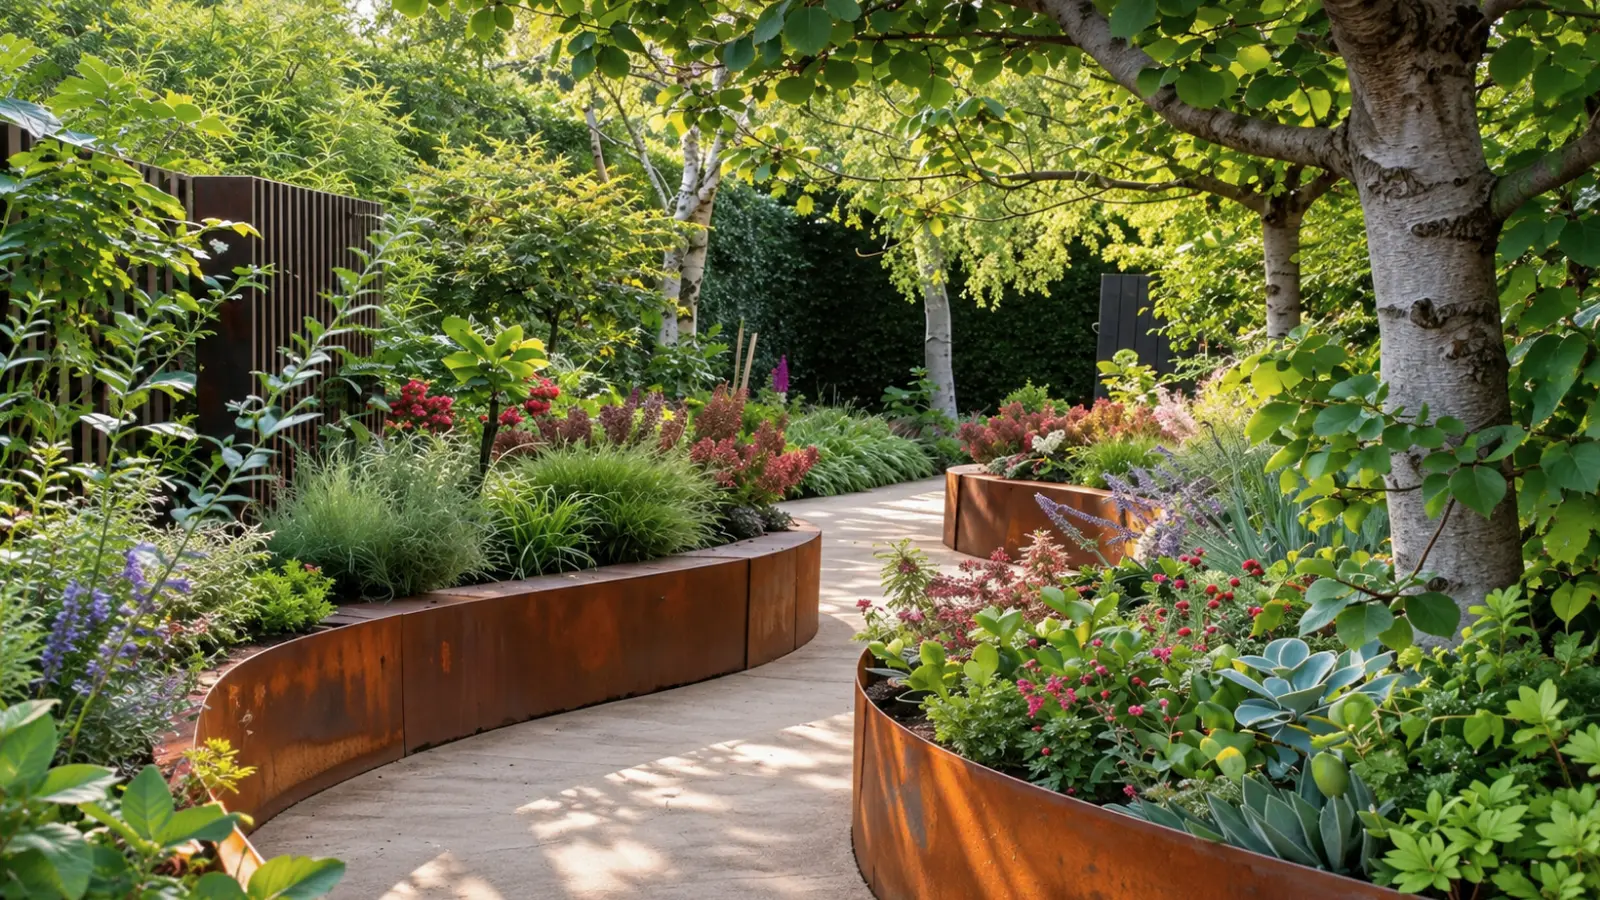
Raised beds can reduce bending and bring plants into a more comfortable working range — but “raised” doesn’t automatically mean accessible. Height, width, knee clearance, soil depth, and approach all matter, and the right dimensions depend on whether the gardener is standing, seated in a wheelchair, or using another mobility aid.
Reachable Raised Beds
A bed accessible from both sides can be up to 4 feet wide for most standing gardeners who can lean comfortably. For seated gardeners, limit the width to about 2 to 3 feet — enough to reach the center without straining. If access is possible from only one side, reduce accordingly. The goal is comfortable, repeated reach, not the maximum distance a person can touch once on a good day.
Elevated Table Beds
For wheelchair users, a bed height of roughly 24 to 30 inches places the soil at a workable level for most seated positions. Where a gardener will roll under the bed to reach across it, the frame needs enough knee and toe clearance underneath — typically at least 27 inches of knee clearance height and 19 inches of depth under the frame, though this varies by chair and individual. Avoid sharp corners on the bed frame, and make sure the structure is stable enough that leaning against it doesn’t shift the bed.
Mixed Heights
A garden with multiple bed heights serves more people. Low beds work for children or gardeners who prefer kneeling; medium beds suit standing gardeners who want to avoid bending all the way to ground level; elevated table beds accommodate seated gardeners. Providing a range also means that a user whose abilities change over time can continue to participate in a different way.
Keep in mind that raised beds dry out faster than in-ground soil, particularly in hot or windy weather. Irrigation should be easy to reach and adjust, and the materials used for the bed frame should be durable, safe to handle, and stable enough not to shift or warp over time.
Design for Realistic Reach Ranges
Reach is shaped by height, shoulder mobility, balance, grip strength, pain levels, fatigue, and whether the gardener is standing, seated, or bracing against a mobility aid. Plan for comfortable repeated movement during a full gardening session — not a one-time stretch on a good day.
Place frequently harvested or maintained plants near the front of beds, within easy reach from the approach. Use trellises to bring climbing plants closer to the gardener, and keep labels, hose connections, valve handles, and light switches within the user’s comfortable working range. A control that’s technically within reach but requires more grip strength or twisting than the gardener has available isn’t actually accessible.
Arrange plants by how often they need attention. High-maintenance vegetables or herbs shouldn’t be tucked at the far end of a bed, while a shrub that only needs seasonal pruning can occupy a harder-to-reach spot without creating a regular problem.
Watching the gardener reach, bend, and turn in real conditions will always reveal more than a reach diagram. If that observation isn’t possible before design, build in flexibility so adjustments can be made after.
Add Seating and Rest Areas
Seating supports both active gardening and recovery between tasks. It belongs near beds, water access, shade, and the main route — not pushed to the edge of the property as an afterthought.
Choose seating that fits the specific user. A chair with arms and a back is easier to rise from than a low, backless bench. A rolling garden stool that moves along a path can let a seated gardener work without constant repositioning. Leave clear space beside any fixed seating for a wheelchair, walker, or companion — at minimum a 30-by-48-inch clear floor area beside the seat.
Provide both sunny and shaded options when the climate and space allow. In hot regions, shade can determine whether a gardener can stay outdoors comfortably at all. In cold or wet climates, wind protection and a dry, non-slip surface underfoot matter just as much as overhead cover. A comfortable place to stop and rest isn’t a luxury — it often determines how long someone can stay in the garden.
Adapt Tools and Irrigation Access
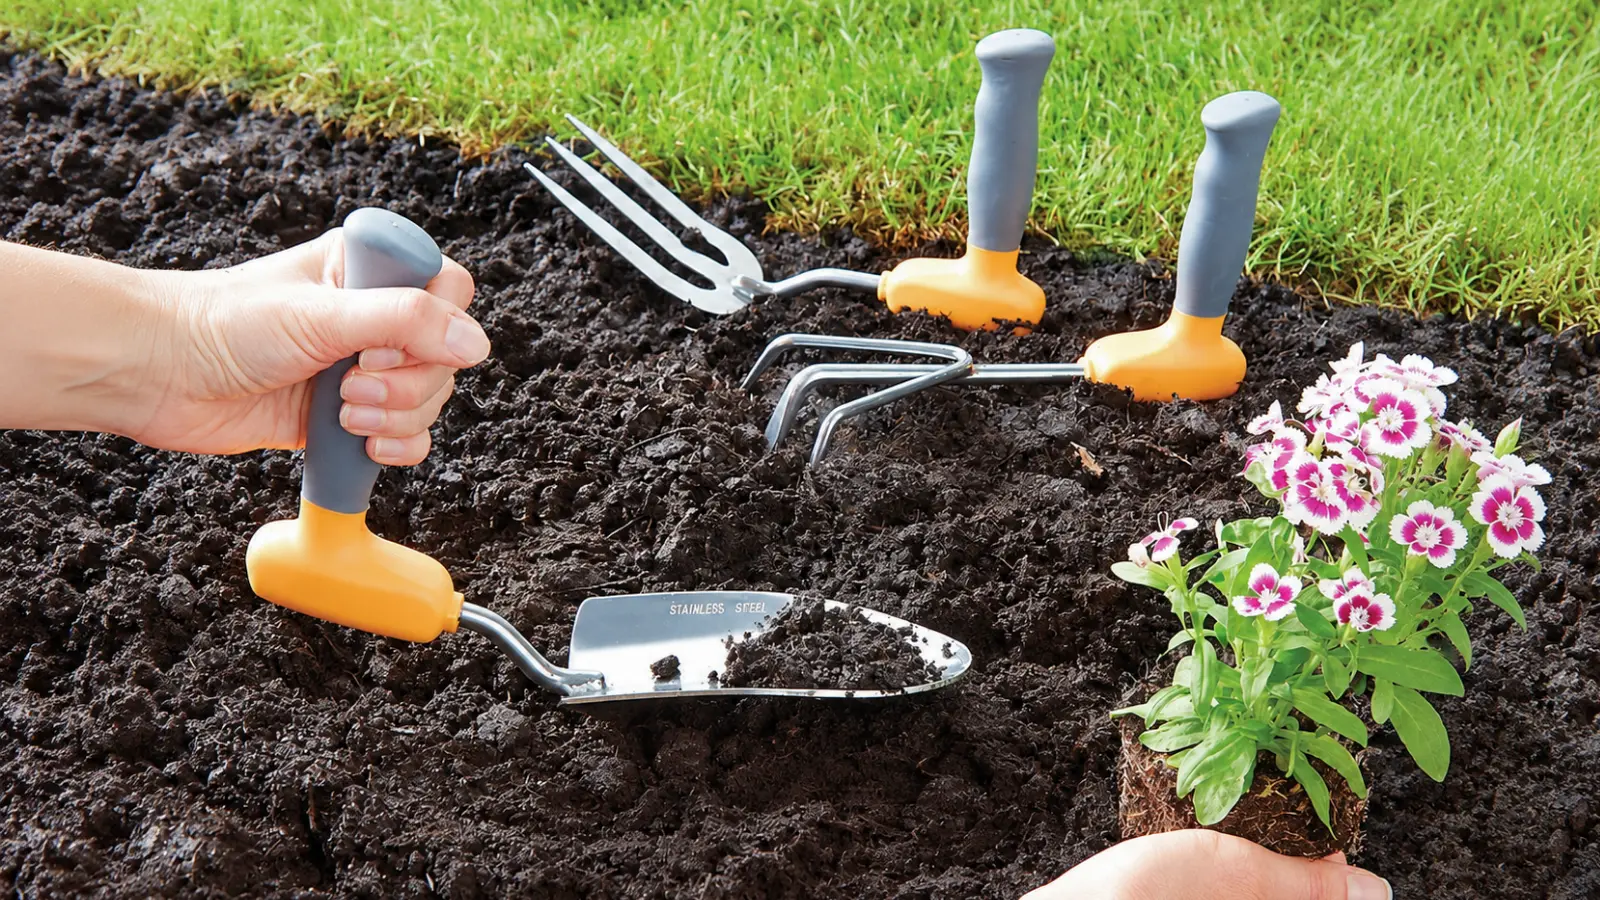
Adaptive gardening tools can make an enormous difference. Common modifications include lighter materials, larger or padded grips that don’t require a tight pinch, ergonomic handles that keep the wrist in a neutral position, long-reach or telescoping extensions that reduce bending, and rolling garden seats that let a gardener move along beds without standing. Oregon State University Extension recommends foam tubing or bicycle handlebar tape wrapped around standard handles as a low-cost way to build up grip diameter for gardeners with limited hand strength.
Brightly colored tool handles — orange, yellow, or lime green — are easier to locate in a bed or against the ground, which helps gardeners with low vision and simply makes it less likely that a tool gets left somewhere it can become a trip hazard. Marking tools with bright duct tape or spray paint is a simple modification that costs almost nothing.
Store frequently used tools at a reachable height, close to the work area. Keep sharp tools and chemicals secured, but make everyday tools easy to retrieve without crossing a long or uneven path.
Irrigation deserves the same attention. Drip systems and soaker hoses reduce the need for repeated lifting and carrying, and automated timers eliminate the task entirely on some days. If a manual connection is needed, use a hose bib lever or large-grip connector rather than a small round knob. Run hoses along the edge of paths rather than across them, and test every valve and control with the user before installation is finalized.
Use Contrast, Wayfinding, and Lighting
Visual contrast helps people distinguish path edges, bed borders, steps, gate handles, and seating from the surrounding landscape. Contrast can come from differences in color, brightness, texture, or surface material. Avoid patterns that create visual confusion or that look like shadows or gaps that aren’t there.
Make the route easy to read. Consistent path material, clear landmarks, readable plant labels at eye level for seated users, and a logical flow from the entrance to the beds to the rest areas all reduce the mental load of navigating the garden. A person with low vision or cognitive changes shouldn’t have to guess where the path ends or which direction leads back to the house.
Lighting should support safe orientation without glare. Illuminate gates, level changes, path intersections, steps, seating areas, and tool access points. Shield fixtures downward where possible, and consider how wet surfaces or pale gravel amplify light at night — a reflection that looks helpful from a standing position may be disorienting from a seated or lower vantage point.
Plant choices can contribute, too. A line of pale-foliaged plants along a path edge can improve visibility, while dense groundcover allowed to creep across the route erases the boundary and creates a walking surface that’s inconsistent underfoot.
Choose Firm, Non-Slip Surfaces
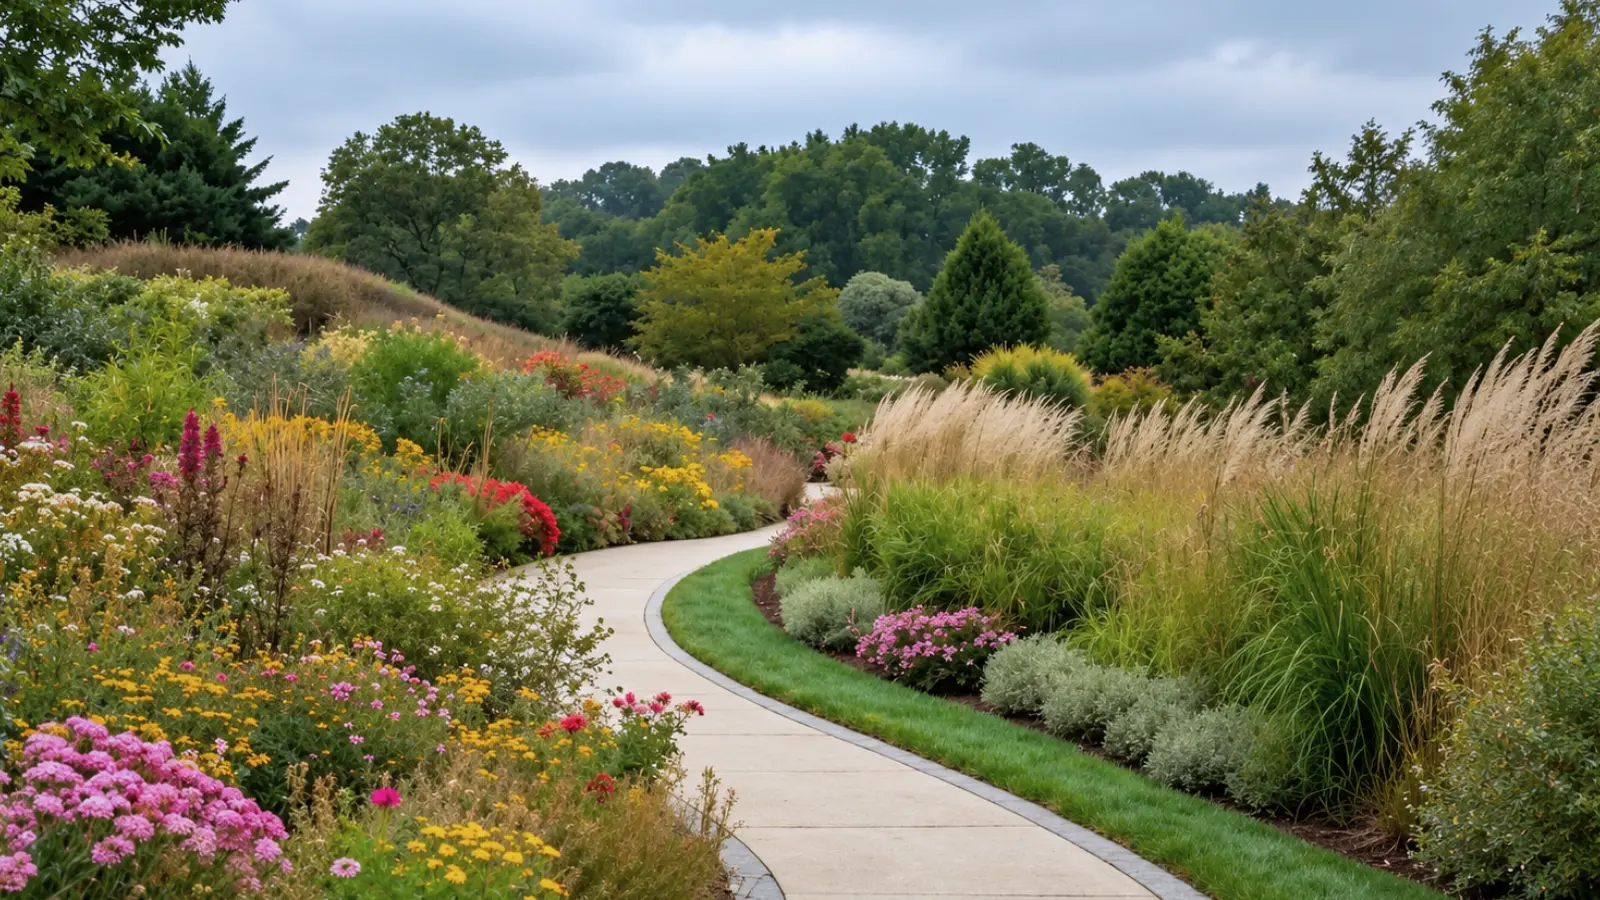
Path material affects balance, wheelchair movement, drainage, and long-term maintenance. A surface that feels fine on a dry afternoon may become slick, soft, or deeply rutted in rain, freeze-thaw cycles, or leaf fall.
Poured concrete, large-format pavers with tight joints, brick, and compacted decomposed granite with a stabilizing binder all perform well for accessible garden paths when installed correctly. Joints and surface transitions must be smooth and level — a lip of even half an inch can catch a wheel or toe. Loose gravel, pea stone, bark mulch, and widely spaced stepping stones are poor choices for primary accessible routes because they shift, sink, and resist wheel movement.
Watch for seasonal problems. Moss, wet leaves, ice, compacted mud, and standing water all reduce the safety of surfaces that are otherwise acceptable. Adequate drainage — including a slight cross slope of 1 to 2% to move water off the path — and regular maintenance before small defects become real barriers will keep the route usable through the year.
Make Gates and Latches Usable
A gate should open without requiring the user to step backward into an obstacle, hold a mobility aid at an awkward angle, or use a grip or twisting motion that exceeds their hand strength. Provide enough clear space on both sides of the gate for approach, opening, and maneuvering — ideally 18 inches of latch-side clearance and enough depth for a wheelchair to pull clear before the gate swings closed.
Lever-style latches and large pull handles are generally easier to operate than small twist knobs, spring clips, or latches requiring two simultaneous motions. Test the specific hardware with the user before installation.
Keep the gate threshold flush and stable. Check that the gate doesn’t sag into the path over time, that vegetation doesn’t narrow the opening, and that leaves, mud, or swelling wood won’t prevent it from opening in every season. A gate that works smoothly in August may be impassable in January.
Reduce Maintenance Demands
Accessibility includes the ability to maintain the garden without excessive bending, carrying, reaching, or emergency repair. A garden that works beautifully on opening day but requires constant physical upkeep may not remain accessible in practice — especially if the gardener’s stamina or condition changes over time.
Choose plants suited to the local climate and the available care. Avoid layouts that require frequent trimming around narrow routes, or species that drop debris onto path surfaces. Mulch can reduce weeding, but it needs to be applied and maintained so it doesn’t wash onto paths or become a loose, unstable layer. Keep shrubs pruned clear of gate approaches and sightlines, and prune branches before they grow to head height or lower on the path.
Inspect the garden at least seasonally for loose or cracked pavers, worn bed edges, leaking hoses, slippery algae growth, blocked drains, and deteriorating handrails. A small repair scheduled into the routine is far easier than managing a barrier that’s developed over a winter.
Check Standards for Public or Regulated Projects
Private residential gardens should be designed around the actual user’s needs. Public, commercial, healthcare, senior living, and community garden projects may also be subject to building codes, ADA accessibility requirements, local permitting, and institutional policies — and those rules aren’t always identical.
The ADA Standards for Accessible Design apply to places of public accommodation and commercial facilities. They define specific requirements for route width, slope, cross slope, turning space, handrails, edge protection, surface firmness, and gate clearances. These are minimum standards, not design goals — a garden that meets only the minimums may still be difficult to use in practice.
For complex projects involving significant grade changes, healthcare users, public access, or a high risk of falls, bring in a qualified landscape architect, occupational therapist, or certified accessibility specialist early in the process. Their input is often most valuable before the first shovel goes in the ground.
Design Around the Gardener Who Will Use It
A successful accessible garden is not created by adding one raised bed or meeting one path-width measurement. Accessibility comes from understanding how a real person moves, reaches, rests, carries tools, controls water and works in the space throughout an ordinary gardening session.
Start with the gardener and test the layout whenever possible, then build flexibility into beds, routes, tools and maintenance. When formal accessibility requirements apply, use them as the minimum framework while continuing to design around the people who will actually use the garden.
COMMON QUESTIONS
Before you begin.
What is an accessible garden?
An accessible garden is designed so people with different levels of mobility, reach, vision, balance, strength and stamina can enter, move through and participate comfortably. It may include stable paths, reachable beds, seating, adapted tools, accessible irrigation controls, clear visual contrast and suitable lighting. The best design responds to the actual gardener rather than assuming the same solution will work for everyone.
How do you make a garden wheelchair accessible?
Start with firm, stable routes that connect every important part of the garden, including beds, seating, water access and tool storage. Provide enough width and turning space for the wheelchair being used, keep hoses and vegetation out of travel routes and position beds, controls and frequently tended plants within a comfortable seated reach. Gates, slopes and surface transitions should also be designed so they do not create new barriers.
How wide should an accessible garden path be?
The article identifies 36 inches as the ADA minimum clear width for an accessible route, while about 48 inches is generally more comfortable for wheelchair maneuvering and for moving beside a companion. Where a path is narrower than 60 inches, passing spaces should be provided at appropriate intervals. Turning areas should accommodate a clear space about 60 inches in diameter where a wheelchair needs to make a full turn.
What height should raised garden beds be for wheelchair users?
A bed height of roughly 24 to 30 inches can place the growing surface within a practical range for many seated gardeners, but the correct height depends on the individual wheelchair and reach. Beds should also remain narrow enough to reach comfortably—often about 2 to 3 feet for seated access—and table-style beds need adequate knee and toe clearance underneath. Testing the dimensions with the actual gardener is more reliable than relying on a standard measurement alone.
What are the best surfaces for accessible garden paths?
Accessible routes should use firm, stable and reasonably smooth materials that remain usable in changing weather. Properly installed concrete, large-format pavers with tight joints, brick and stabilized decomposed granite can work well, while loose gravel, pea stone, bark mulch and widely spaced stepping stones are poor choices for primary accessible routes. Drainage and regular maintenance are also important because water, ice, algae or uneven joints can turn an otherwise suitable surface into a hazard.
How can you make a garden easier to use for someone with low vision?
Use consistent path materials, strong contrast at path edges and level changes, clearly visible landmarks and readable labels positioned where the gardener can see them comfortably. Lighting should make gates, intersections, steps and work areas easier to identify without producing excessive glare. Brightly colored tool handles and carefully placed sensory cues can also help with orientation, but they should complement—not replace—a physically safe and clearly defined route.