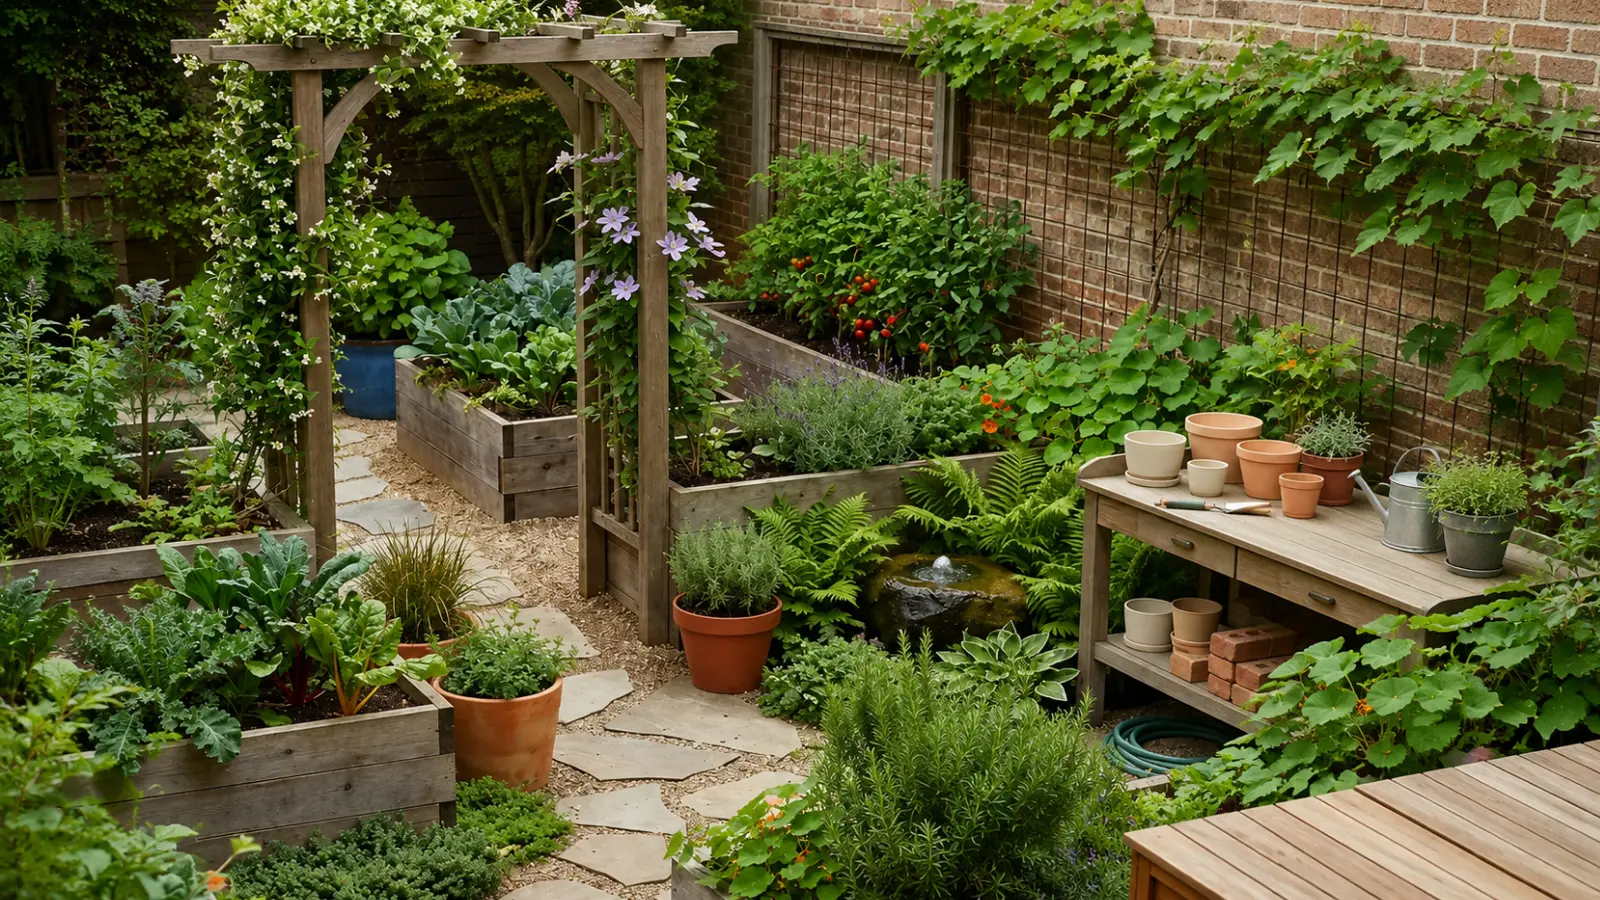
A good garden layout turns your plans into a space that actually works. Before deciding where individual plants should go, organize the boundaries, sunlight, water access, paths, growing areas, work zones and fixed features so the garden is easy to reach, maintain and move through.
This guide explains how to create a functional garden layout for different spaces, including how to position beds and containers, plan paths and working access, account for plant height and mature size, organize small or large gardens, improve accessibility, sketch the layout and avoid common arrangement mistakes.
Garden Layout at a Glance
Start with the boundaries, then mark sun, shade, water access and fixed features. Place the main growing areas where they can be reached, connect them with practical paths, keep taller plants from blocking shorter ones, and reserve space for tools and maintenance. Leave enough room for mature growth and future changes. A strong layout helps the garden function before it tries to make a decorative statement.
What a Garden Layout Is
A garden layout is a visual plan of the garden’s physical arrangement. It may show beds, containers, paths, trees, structures, water access, working space and planting zones. It answers questions such as: Where will people walk? Which areas receive sun? How will the center of a bed be reached? Where will a hose, tool or wheelbarrow pass?
This is different from garden planning. How to Plan a Garden establishes the garden’s purpose, contents, conditions and maintenance requirements. The layout places those decisions in space. It is also different from advanced garden design, which may focus more deeply on style, composition and landscape character.
Whether you are comparing garden layouts, looking for garden layout ideas or sketching garden layout plans, the best arrangement makes ordinary care easier. Good garden layout design does not use every inch simply because it is available.
Start With Boundaries, Sun and Water
Every garden layout begins with information that does not move. Draw the site before drawing the beds. A rough but honest base map is more useful than a polished plan built on incorrect assumptions.
Start With the Boundaries
Mark fences, walls, property lines, steps, gates, buildings, trees and other permanent features. Note slopes, narrow passages and places where a hose or person must pass. If you are working in a rental or shared property, include the areas you cannot alter.
Mark Sun and Shade
Divide the site into broad exposure zones rather than labeling the entire garden “sunny.” Mark morning sun, afternoon sun, filtered light and shade. Recheck the pattern as trees leaf out or the season changes. In a garden layout design, exposure zones should influence where planting areas go before decorative symmetry does.
Mark Water Access
Place the faucet, rain barrel or other water source on the plan and draw the route water must travel. A bed that looks perfectly positioned may become inconvenient if every watering requires carrying a full can across a walkway. Keep water-dependent areas within a realistic reach, and avoid creating trip hazards with hoses.
Position the Main Growing Areas
Once the boundaries and conditions are marked, decide where the garden’s main growing areas should sit. This is the central spatial decision in planning a garden layout.
Group Areas by Function
Group plants or areas that share a practical purpose or similar conditions. A viewing area may deserve a clear foreground, while frequently harvested plants should be easy to reach. Plants with similar water or light needs can be grouped when doing so simplifies care.
Do not force every category into a separate bed. The layout should reflect how you will use the garden, not create extra borders that make maintenance harder.
Choose the Main Shape
Rectangular beds, curved borders, islands, rows and container groupings can all work. Let the site and the access requirements guide the shape. Straight edges are often efficient in small or formal spaces; gentle curves may suit a wider area when they still leave usable paths.
Before committing to a shape, walk the proposed route. A shape that looks appealing on paper may create awkward corners, narrow passages or inaccessible planting areas.
Plan Bed Width, Paths and Access
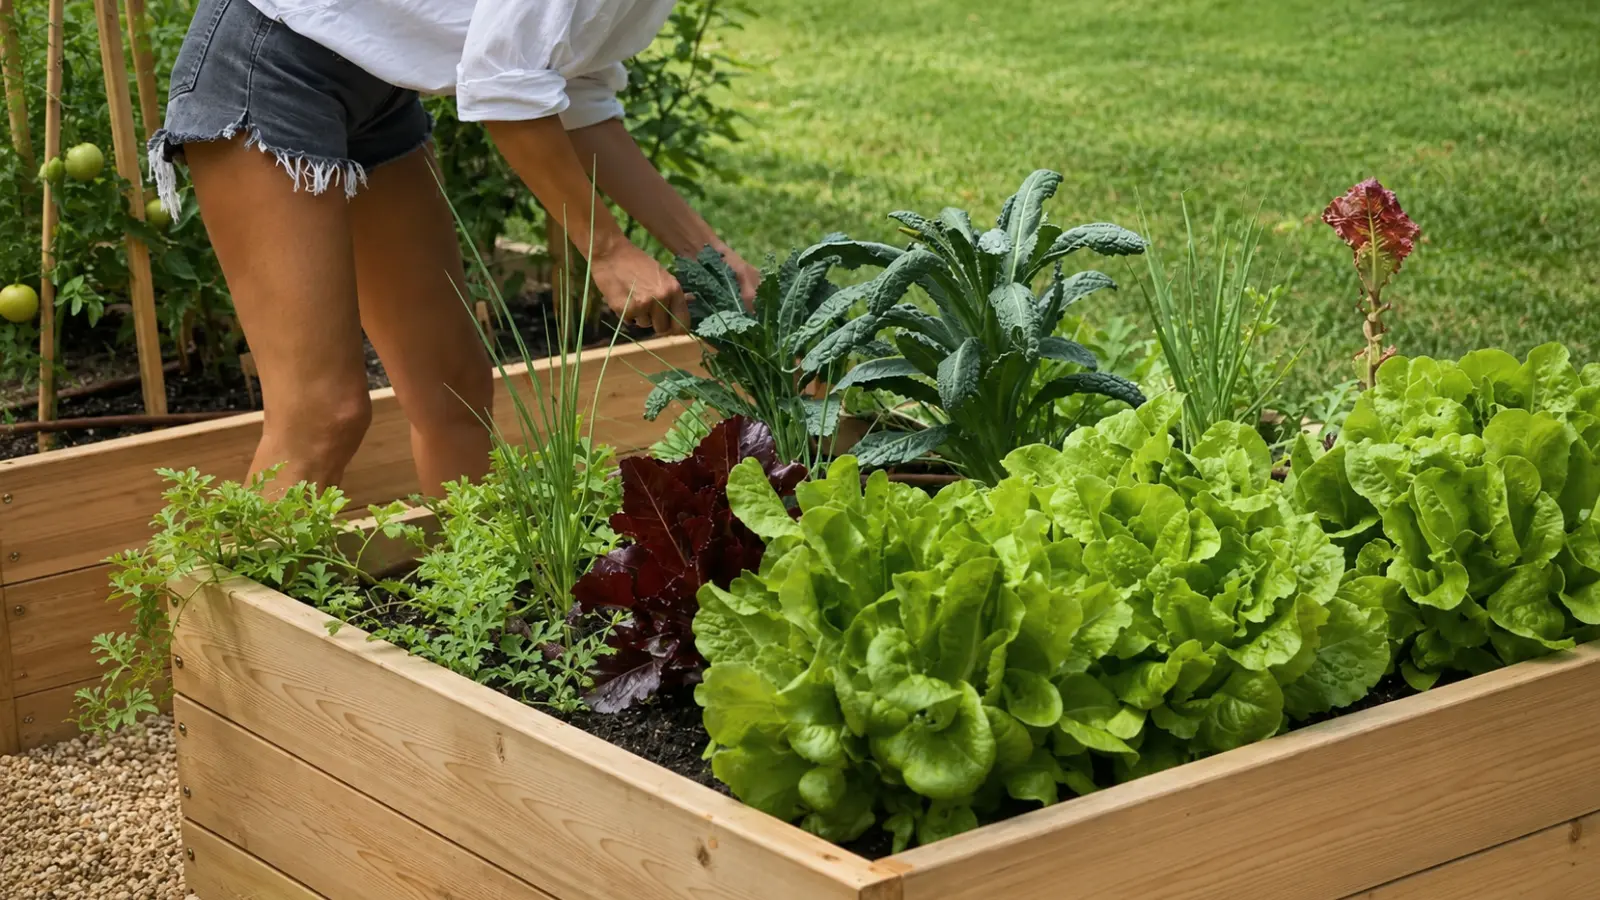
A layout is only functional when the gardener can reach the plants without damaging the soil or surrounding growth. Paths and bed dimensions are working decisions, not leftover space after planting.
Bed Width and Reach
Make beds narrow enough to reach from an edge, or include a path through a wider bed. The appropriate width depends on the gardener’s reach, the bed’s height and whether both sides are accessible. Do not assume that one standard measurement works for every person or garden.
Test the plan physically with a tape measure or temporary markers. Kneel, reach and imagine removing weeds from the center before finalizing the bed.
Path Width and Access
Paths should connect entrances, water, tools, seating and every main planting area. Allow room for the way you will use them: walking, carrying a watering can, pushing a cart or moving around a container. Keep edges visible and avoid paths that end at a bed with no practical way around it.
For a small garden arrangement, one clear route may be more useful than several narrow paths. For a larger garden, a simple hierarchy of main and secondary paths can reduce unnecessary walking.
Add Water, Tools and Work Areas
Gardens need places for work, even when those places are not visually prominent. Include them in the layout instead of expecting maintenance to happen wherever there is temporary space.
Water Access
Keep the route from the water source to the growing areas clear. If watering will involve carrying cans, place heavier or more frequently watered containers closer to the source. If you use a hose, plan where it will rest without crossing delicate plants or the main walking route.
Tool and Work Area
Reserve a small area for tools, soil, empty pots, labels or a place to set down harvested material. It may be a practical corner beside a shed, a stable surface near containers or a clear section of a larger bed area. The exact solution depends on the space; the important point is to account for the work.
Arrange Plant Height and Orientation
Plant height affects both visibility and light. The tallest element is not always placed at the back, because the best position depends on the direction of sun, the view from the house and whether the garden can be seen from more than one side.
Tall vs. Short Plant Placement
Place taller plants where they will not unnecessarily shade shorter plants or block access. If the main light comes from the south, tall structures or plants may cast shadows toward the north; verify the actual site rather than relying on a universal orientation rule. In an island bed viewed from all sides, taller plants may work near the center if they do not create a maintenance problem.
Orientation Basics
Mark north, south, east and west on the plan when sun direction matters. Also mark the primary viewpoints: a kitchen window, patio, front walk or favorite chair. A layout should work both from above and from the places where people actually experience the garden.
Use Edges, Repetition and Variety
Once the functional structure works, use simple visual principles to make the arrangement feel intentional. These are supporting decisions, not reasons to compromise access or plant suitability.
Edge and Border Logic
Edges can define a bed, protect a path and make mowing or trimming easier. Keep borders consistent enough to read clearly, but do not add edging solely for decoration. A bed edge should help separate materials or guide movement.
Repetition vs. Variety
Repetition can connect separate areas through a recurring plant form, material, color or container shape. Variety adds interest through changes in height, texture or seasonal effect. Too much repetition can feel rigid; too much variety can make the plan feel scattered. Use a small number of repeated elements and let the site conditions determine where they belong.
Small- and Large-Space Principles
Small Garden Layout Principles
In a small space, prioritize access, light and multifunctional elements. Use containers where they solve a real limitation, keep the main route clear and choose fewer planting areas with enough room to reach them. Vertical interest can be useful, but structures must not block light or make watering difficult.
A narrow garden layout often works best with one continuous bed along an edge and a clear passage beside it. Avoid dividing a narrow space into several small islands unless each island remains accessible.
Large Garden Layout Principles
In a larger space, divide the garden into understandable rooms or zones without creating a confusing network of paths. Establish a main route, then connect secondary areas to it. Repeat materials or shapes so the garden feels related as you move through it.
Leave some areas intentionally open. A large garden needs working space, views and room for future decisions as much as it needs planting area.
Accessibility and Future Expansion
Accessibility should be part of the first layout, not a correction after the garden is built. Consider stable paths, comfortable reach, turning space, bed height, seating and the weight of materials that must be carried. The person using the garden should be able to reach the plants and complete routine care safely.
Also reserve a place for growth. Future expansion may mean adding one bed, extending a border, moving containers or allowing an established plant to occupy more space. A layout with a little breathing room can adapt more easily than one that is already full.
Universal Garden Layout Examples
These examples are intentionally universal. They show spatial relationships rather than plant-specific plans, so you can adapt them to different purposes, climates and garden types.
This arrangement works when the site is compact and both beds can be reached from the path. The beds can serve different purposes or share a consistent planting logic. Keep the water point at an edge rather than placing it where it interrupts the route.
A narrow space usually benefits from one strong relationship between planting and passage. Breaking the border into many islands can reduce usable width and create corners that are hard to maintain.
Mixed formats can be useful when different parts of the site have different light, soil or access conditions. Keep containers where they can be watered and moved without blocking the main route.
The accessible example is a planning relationship, not a universal measurement. Adjust the route, bed height and turning space to the person who will use the garden and the equipment they need.
How to Sketch the Layout
You can create a useful first sketch with paper, a pencil and a measuring tape. Use one consistent scale, even if it is simple, such as one square representing one foot.
- Draw the boundaries and fixed features.
- Mark north, sun, shade, slopes and water access.
- Draw the main route and working space before planting areas.
- Place beds, containers and other growing areas.
- Mark tall, short and fixed plants according to light and views.
- Label mature sizes, access points and maintenance zones.
- Walk the proposed layout with temporary markers and revise it.
Keep the first drawing readable. The purpose of a garden layout plan is to reveal relationships and conflicts, not to show every plant detail immediately.
Common Garden Layout Mistakes
Most layout problems are practical rather than aesthetic. Check for these before finalizing the arrangement:
- Creating beds that cannot be reached from an edge or path.
- Making paths too narrow for the way they will be used.
- Placing water-dependent areas far from the water source.
- Ignoring shade cast by trees, structures or tall plants.
- Filling every open area and leaving no working space.
- Choosing a shape that creates awkward corners or dead ends.
- Planting tall elements where they block important light or views.
- Designing for the nursery size instead of mature plant size.
- Adding decorative edges that make mowing or maintenance harder.
- Planning a layout that cannot adapt when the garden changes.
If a layout is difficult to maintain on paper, adding more plants will not solve the problem. Simplify the route, widen access or reduce the active growing area before moving forward.
Use the Garden Planner
A digital or printable planner can make dimensions and relationships easier to compare. Add the boundary, fixed features, exposure zones, water access, paths and beds first. Only then add individual plants or decorative details.
Use the Free Garden Planner to test a few universal arrangements, compare bed sizes and keep a printable version of the plan. If you need to decide what the garden should contain before drawing it, return to How to Plan a Garden.
Design the Garden Around How It Will Be Used
A successful garden layout should make ordinary tasks feel natural. Paths should lead where you need to go, planting areas should be easy to reach, water should be accessible, and mature plants should have enough space without blocking important light, views or movement.
Build the functional structure first and add visual detail afterward. When the layout supports watering, maintenance, access and future growth, the garden has room to become more beautiful over time without becoming harder to manage.
COMMON QUESTIONS
Before you begin.
What is the best garden layout?
The best garden layout is one that fits your site, purpose and maintenance routine. It should provide practical paths, easy water access, reachable planting areas and enough room for plants at their mature size. There is no single ideal arrangement because sunlight, space, garden type and how you use the area all affect the layout.
How do I create a garden layout?
Start by drawing the boundaries and marking fixed features such as buildings, fences, trees and gates. Add sunlight and shade zones, water access and the main walking routes before positioning beds or containers. Then arrange planting areas according to light, mature plant size, maintenance access and how the garden will be used.
How wide should garden beds be?
Garden beds should be narrow enough that you can comfortably reach the plants without stepping into the growing area. A bed accessible from both sides can generally be wider than one reached from only one side. The best width depends on the gardener’s reach, bed height, plant size and accessibility needs, so test the proposed dimensions before building or planting.
How wide should garden paths be?
Garden paths should be wide enough for their intended use. Consider whether you will simply walk through them or also carry watering cans, move tools, push a cart or use mobility equipment. Main routes typically need more room than secondary paths, and every path should remain stable, accessible and clear as nearby plants mature.
How do I lay out a small or narrow garden?
Prioritize one clear circulation route and avoid dividing the space into several difficult-to-reach planting areas. In a narrow garden, a continuous border along one side with an accessible passage beside it can use space efficiently. Keep mature plant width, sunlight, water access and maintenance needs in mind before filling the available area.
Should taller plants always go at the back of a garden bed?
No. Taller plants are often placed behind shorter ones in beds viewed primarily from one side, but this is not a universal rule. Consider the direction of sunlight, important views, access and whether the bed is visible from multiple sides. Taller plants should be positioned where they will not unnecessarily shade shorter plants or block movement and visibility.